 |
| my boy refused to pose in a headband... so you get a doll! |
They were quick, easy, and made of scrap t-shirt material so the only cost was my minimal time.
Supplies:
Knit material (4 pieces 1 x 10 inches)
The edge of a sleeve
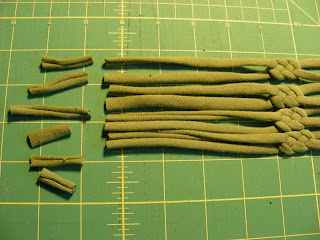
Cut the 4 pieces of material. Pull on the ends of the material so they curl on themselves, like the picture below.
Fold one piece of material in half, lay it on the table, and make a fish with the material (like below).
Take a second piece of material and weave it through the fish, making a second fish.
Pull the knots tight, straitening up the ends as much as possible.
Cut 1 to 2 inches off one end. This will allow the knot to lay on one side of the head, rather than in the center.
Cut off the sleeve edge, right down to the sewing line. Cut off 2 pieces 1 1/2 inches long.
Take the two ends of the knot and place them inside a third piece of material. Sew across the material to hold the two pieces together.
Take the 1 1/2 inch sleeve piece and fold it around the piece you just sewed together.
Sew up the seam. If you know the circumference of the baby's head, you can now cut the piece to the size of the head and attach it to the other side of the knot. Or, if you would prefer, you can attach the 4th piece to the other side of the knot so mom can tie the headband on.
Now your headband is ready to wear! If you want a thicker knot, you can make the bands thicker. I did this for one for me. I also like it backwards when it's thicker, so you can see the two sides curling on each other.


No comments:
Post a Comment