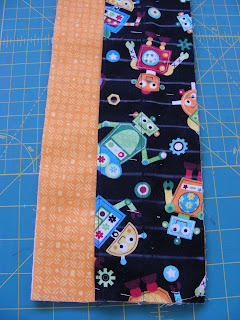
3 weeks ago my son, Logan, started enjoying coloring! We've tried coloring over and over for the past 6 months, and it finally stuck. So I decided to make him a crayon roll to take with us. This way when we go to Grandma's or church, we have easy access to crayons.
Supplies:
3 pieces of material (5 x 13 inches)
1 lining, 1 pocket, 1 outside
1 piece of warm & natural batting (5 x 13)
1 piece of ribbon 24 inches long
I recommend using a different color of material for the lining than the pocket. That way it's easy for the kid using the roll to see where to put the crayon in.
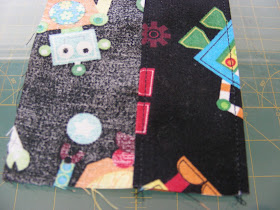
First, take the pocket piece and fold it in half. Slide the top half up 1 1/2 inches up. Pin down the material and press. Sew along the top edge, 1/8 inch from the fold. Fold the bottom, short end of the material over 1/4 of an inch and sew 1/8 an inch from the edge.
Lay the batting down, followed by the lining, followed by the pocket (with good sides up). Pin the ends down, and mark a strait line 1 1/4 inch from the end. Then mark a strait line 3/4 of an inch from that line and continue until you reach the end of the roll. The last line should be approximately 1 1/4 inch from the end.
Sew on these lines making sure to back stitch at the top of the pocket. This will keep the roll from coming apart.
Pin the ribbon in place right in the middle of the roll on the right side. Sew 1/8 of an inch from the edge. Backstitch a few times to keep the ribbon secure. Pin the long tail of the ribbon inside of the roll so it won't get sewn over on the next step.
Place the back material on top of the inside and pin down. Sew along the edge of the material, leaving a 3 inch gap to flip the material the right direction.
Cut the corners off to ensure the flipping process will run smoothly. Flip everything the right way. Press the material. Make sure you press the material that isn't sewn (where you flipped the material).
Sew 1/8 inch from the edge of the material all the way around.
Put your crayons into the roll and roll it up. This would make a fun birthday or Christmas gift. It only took me an hour to make (including ironing and cutting the material), so it's not really labor intensive.
Enjoy!


I've always wanted to make one of those! So cute! That would be great for makeup (eyeliner, gloss, mascara, etc.). I have that same robot fabric, too.
ReplyDeleteYour quilts are amazing. G-ma Kathy and your mom must have passed down some mean quilting genes.
Thanks Melissa! We do enjoy quilting in this family.
DeleteI've actually made one of these for my crochet hooks, and it turned out great too. You're right, this could be used for makeup, or really anything long and slender.
I never thought of the other uses for the holder and since my kids were all grown when these came out I just thought they were cute. I'm seeing a crayon/makeup holder in my future!!!
ReplyDelete