Monday, September 10, 2012

Quilted Zipper Bag


I saw a cute zipper bag on Pinterest and thought it would be so much cuter if it was quilted! So I created a fun pattern and made three bags to organize my son's toys in!

Supplies:
2 Outside Cotton Material (14 x 8)
2 Lining Cotton Material (14 x 13)
2 Duck Material (14 x 6)
2 Warm & Natural Batting (14 x 13)
14 inch Zipper

I decided I wanted the bottom to be sturdy so the bag would stand up on its own, which is why I picked Duck. You can switch it up if desired! I also decided on a 1/2 inch seam allowance for this project since this is for Logan, and he tends to destroy things. Also, I sewed a little end piece on my zipper so the bag would line up better. Not necessary, but adds to the finish.

After you've cut your pieces, sew the outside cotton to the duck material. Press the outside so the seam folds away from the duck. Next, place the Warm and Natural on top of the outside cotton and duck. Choose a pattern to quilt the two together. I decided on a crossed pattern.


Place the outside on the ground, (material up and batting down). Place the zipper on top of the outside with the tab of the zipper down. Finally, place the liner on top of the zipper, wrong side facing up. Pin all three together and sew with your zipper foot. Fold all pieces so the zipper is out and the liner and outside are together with the right sides out. Iron the material.


Place the second inner lining on the ground with the right side facing up. Place the sewn piece with the zipper on the top, lining facing lining (outside facing up). Finally place the other outside piece on top of the zipper with the batting facing up (right side facing in). Pin and sew these pieces together.


Iron the material so the zipper is in the middle with everything pulling away from it. Let the material cool.


Pull the outsides together and the liners together (right sides in, wrong sides out). Pin and sew the outsides together. If desired, trim the warm and natural down to the seam to reduce bulk in the seams.


Pin the lining, leaving a 4 inch gap in the middle to flip the bag around with. Sew, backstitching around the gap for strength.


Fold all 4 corners so the seams are in the exact center. Lining up the ruler so the bottom of the triangle measures 3 inches. Pin and sew making sure to back stitch for strength.

Flip the bag through the 4 inch hole so it looks like the completed bag. Blind stitch the 4 inch hole together. Push the liner back inside of the bag and fill! Enjoy your new bag!


Friday, September 7, 2012

Freezer Paper T-shirts


I swear every summer a kid has to decorate a t-shirt or two. I remember going to girls camp and coming back with a puffy painted, sharpie-ed, or tie-dyed shirt and thinking it was the coolest thing in my wardrobe. And what can I say, I've been custom making shirts ever since. Some of my favorite shirts are ones I designed and worked on.


One of the easiest and most precise method I've found is using freezer paper to create your design. So today I'll run you through the basics of Freezer paper t-shirts. I use Reynolds brand freezer paper because it's extremely wide and the plastic coating works fabulously to adhere to the t-shirt. A good seal means your paint won't bleed.


Something that's not necessary, but makes the process go so much faster and less messy is using Tulip's Fabric Spray Paint. You can use any paint, but with this spray paint you are done painting in less than a minute. Also, there's no cleanup since you didn't use brushes, etc. 

Supplies:
Freezer Paper
Paint (and the methods of applying if you aren't using spray)
Pencil
Exacto knife
Mat to cut out on 
Iron & Ironing Board
Scrap Cardboard
4 paper bags
Iron
Ironing Board

Here's how you do it. First you cut a piece of freezer paper about 6 inches larger than the size of your design. You can sketch out your design ahead of time so you know how big you want it to be, and then trace it onto your freezer paper if you want. 


Then you use an exacto knife to cut out and remove what you want to be painted. This is the longest part of the process, making sure all the cutting is perfect. The inspiration for my design was the wall of a hotel I saw a little while ago. This type of pattern was repeated over and over again. I took a picture and sketched out one of the 4 squares, then repeated the pattern 3 more times


Next you place your design on the shirt where you want it to be, and iron the freezer paper onto the shirt (waxy/shiny side down, dull paper side up towards iron). Let the shirt cool completely.


Place a piece of cardboard inside the shirt under the design, just incase the paint bleeds through. Mask off the edges of the shirt, because sometimes spray paint can get everywhere. I use old brown paper bags and store them to use again and again.


Spray the paint onto the design. Let dry for an hour, then remove the brown paper bags and carefully peel off the wax paper. The material will still be a little damp, but you want to remove the paper before it completely dries. If you don't the paper will stick to the paint and make it hard to remove.


Let the shirt sit overnight and be ready to enjoy it the next day!


You can stick to one color, or you can get more intricate by adding several colors, one at a time. The above shirt was done with this method. I masked off the yellow and blue first (covering the yellow & peach when I was spray painting the blue, and vice versa. Let that dry completely, then masked off the black area and painted that (with craft paint and a brush).

Get creative! Try it out and post a link to your design!

Wednesday, September 5, 2012

Halloween Table Runner


Over the past year I put together an autumn quilt (that I'm in the process of finishing). At one point I had an appliqued panel that I was going to use, but decided against it. So I had to figure out what to do with the already created panel. That is what it looked like.

Source: Crazy Mom Quilts
So, I decided to make it into a table runner for October! I saw a really cool picture on Pinterest for a scrap quilt (I wanted mine less uniform and more crazy quilt-ish since it's a halloween quilt, so I changed it up a bit). Since I have tons of scraps leftover from my autumn quilt, I decided to do something similar.

First I gathered all the scraps by color. Next, I paired materials and started the triangles. 


I'm still working on this project, but this is the start of it! It's going to be way cute when it's done. This is the layout I have in mind at this point. Hopefully I will be able to finish it by next week and I can show you the finished project.


*Don't you love the one that looks like a candy corn (bottom center)? It's my favorite!

Monday, September 3, 2012

Altering a Shirt

I've been looking for a nice white shirt for a few weeks now. Dave's family is doing family pictures in September, and I needed one to wear to match Logan. I've been all over every store to try to find something cute and inexpensive. After getting desperate, I tried the thrift store and even Kmart.

I found a shirt on clearance at Kmart. It was cute, but didn't fit me right. This happens to me all the time. My figure is more of an inverted triangle than anything else (ie. my shoulders are wider than my hips). So when I put on a button up, it fits my shoulders, but my waste is swimming.


So when I found this shirt, I thought to myself, I can fix that. As can you with whatever happens to be your body challenge.  I started by putting the shirt on inside out, and pinning the sides to where I thought it needed to be. Flip the shirt the right way, and see what you think. 


I decided also to increase the tucks in the back to give me a little more of a waste without it looking like I did that from the front. Sew down these lines, press your sewing and try the shirt on again.


If you want, you can trim down and zigzag the edges so you don't have such large seams. I leave them in, because you might need to take them back out later. You never know ;)

Friday, August 31, 2012

Easy & Quick Flying Geese

I've been taught 3 different ways to make flying geese. Some are no brainers, but take a lot of extra material. The latest method I've been taught is quick, uses minimal material, and fast to do. It requires 3 different rulers, but it's worth the investment if you're going to quilt a lot.


First, use a flying geese ruler to cut one large square and 4 small squares (to make 4 flying geese). I'm not attached to any specific one, I've used several and they all work fine.


Second, take all of the smallest squares and cut off the corners with the second ruler, the Corner Cutter I've never seen this one before and I love it! Why cut off the corner? Because it leaves less bulk in sewing which will lay flatter in the end.


Next, take the two small squares and stick them on top of the larger square (with the cut corners in the middle). Measure diagonally across the smaller squares and use your quarter inch ruler to mark a line a quarter inch above and below the center line. Sew along the outside two lines. 

This ruler isn't my favorite. It works fine, but I like to mark the center as well as the two edges. I don't know the name of the ruler that lets me do that, but it has a dash line through the center so you can mark the center as well.


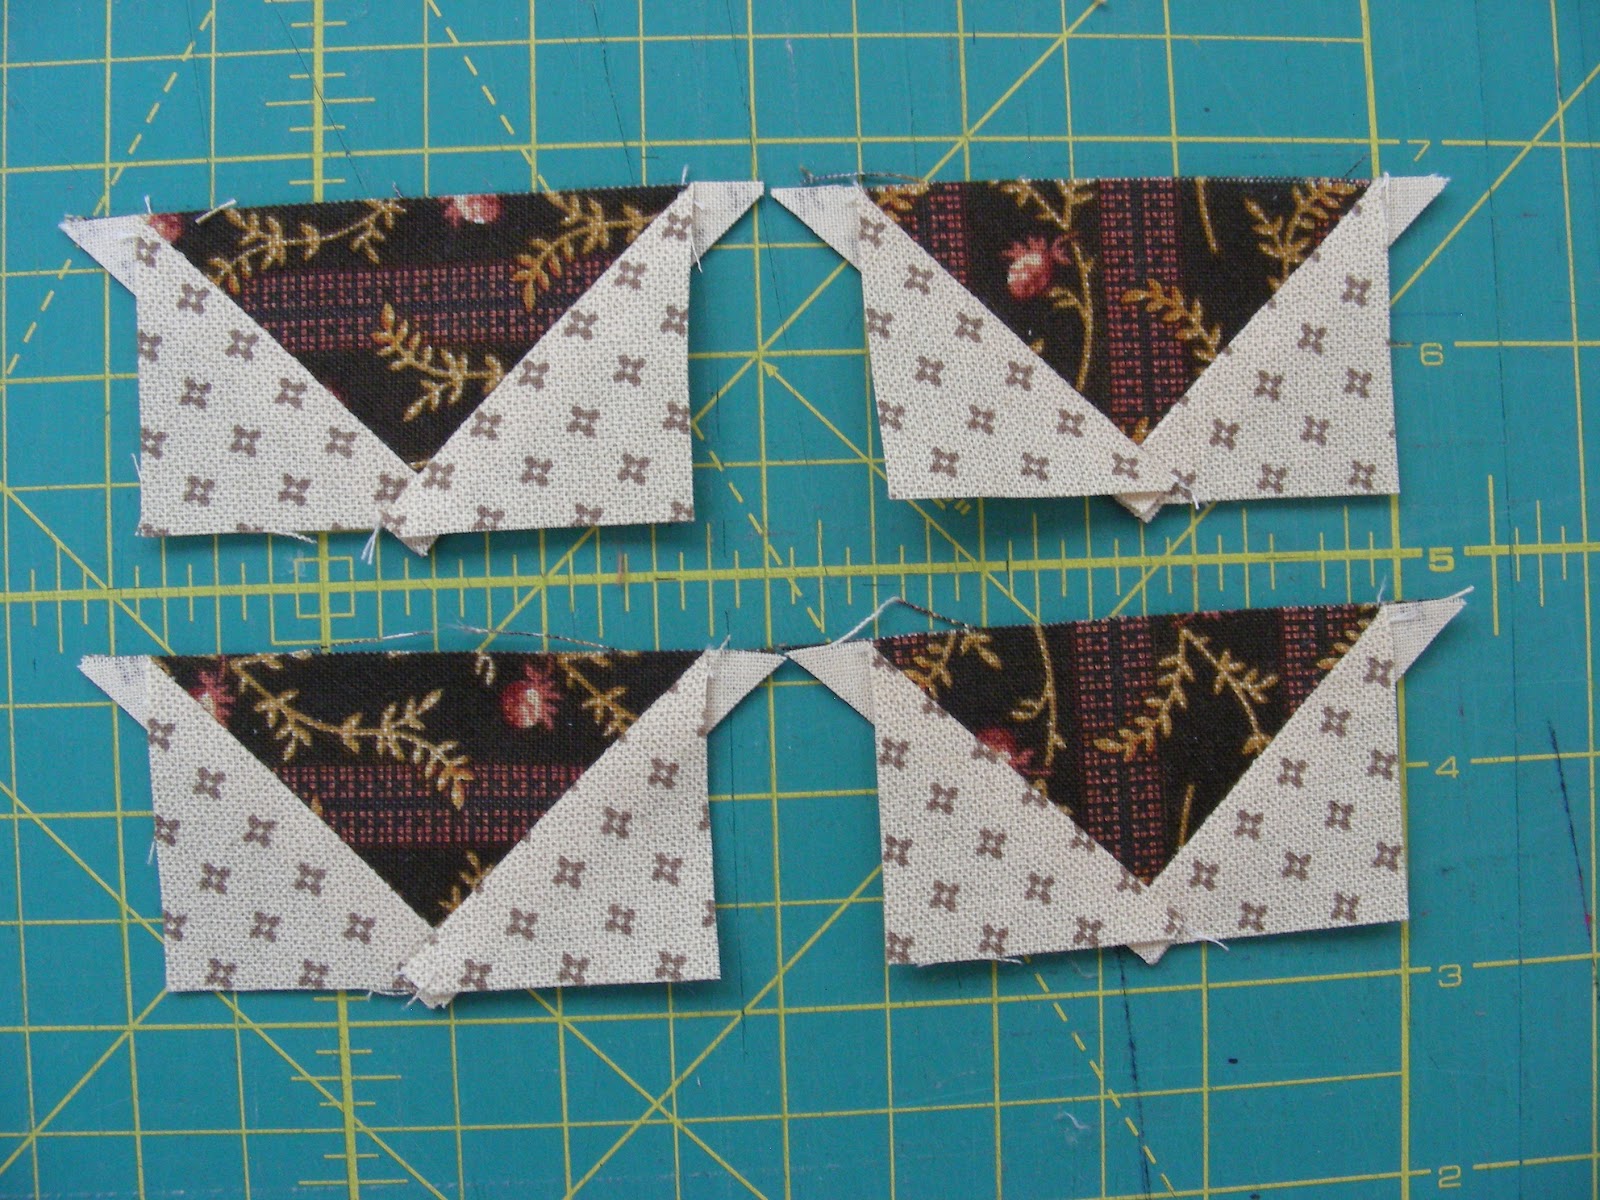
Once the two outer lines are sewn, cut down the middle. Iron the two small triangles out, making two little heart shapes.


Place your last two small squares on top of the point of the heart (make sure you cut the corners of these small squares too). Mark the top and the bottom of the ruler and sew along those lines.


Cut down the center of each square. Iron the other side out, and you've got your 4 flying geese! Trim off the little corners and make sure the geese are the right size. With these rulers, the geese end up pretty much perfect.


Now you can add them to your final square


Wednesday, August 29, 2012

Flying Geese

I've been around quilting my whole life. My mom quilts. My Grandma quilts. My Aunt quilts. I knew some day I would start quilting. Right before Logan was born, I took my first quilting class from a little old lady in the neighborhood. She was amazing! The classes were 3 hours once a week and that's where I got my foundation in quilting.


Now I attend a monthly Quilting class down in Provo with my Mom and Cousin. It's fun because of who we go with, but we also get some fun pointers along the way. One of the squares we're working on for next class involved about 8 flying geese. So today I've been sewing these squares.


I'll post more on Friday with details on the easiest & fastest way to make the flying geese.

Monday, August 27, 2012

The Sassy Seamstress Starts!

I've been toying with the idea of starting a "real blog" for the past few years. By real blog, I mean something with meaning and direction. Not the blog I write to keep my family updated. About a year ago I decided I wanted to write a sewing blog, but the first year of my son (Logan)'s life was a hard transition into motherhood and the blog got pushed off. I've been sewing more than ever in my life and have been itching to share it with the world.

I was asked on Sunday how long I've been sewing, and I answered "Um... forever!"And really it's true. I remember sewing clothes for my barbies and dolls as a kid, I took a basic sewing class in middle school, and an apparel and design class in college. Now I mostly sew stuff to go around the house, alter  my husband Dave, Logan and my clothes and do some quilting on the side.

I sew for a few reasons. One, it's all about the quality! Half the time you get something from the store, it's only made to last for a year or two. When you make it yourself you can pick the best materials and know it's going to last for years to come. Second, you can make exactly what you want. When it's custom you know your project will be perfect for whatever you had it intended for. Finally, you can alter store bought clothes and taylor them to fit your family perfectly. Your clothes can look good, but they look so much better when they have been sewn to fit.

Follow my blog and be inspired! I'll post pictures of my projects, tutorials, and fun projects & products that I love to use myself.